How to Create & Use a LetterHead Overlay In An Olivetti Colour MFD Print Driver
You first need to create the Letterhead to use as the host image in a program such as Word or a design package such as In-Design.
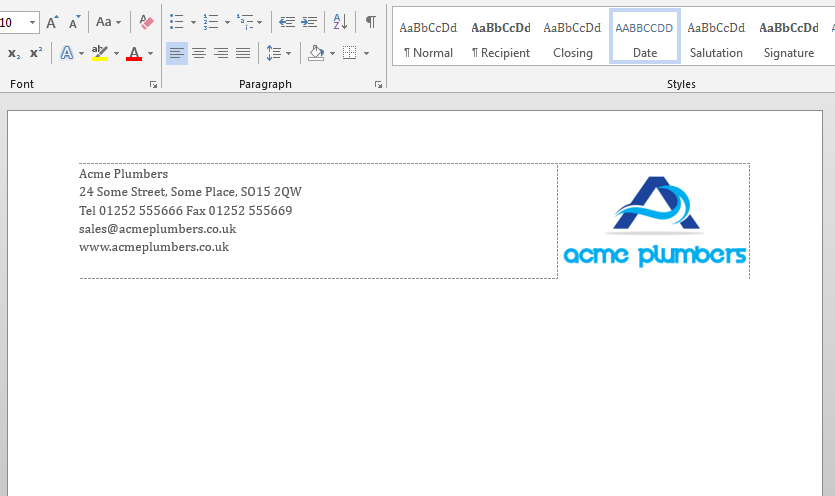
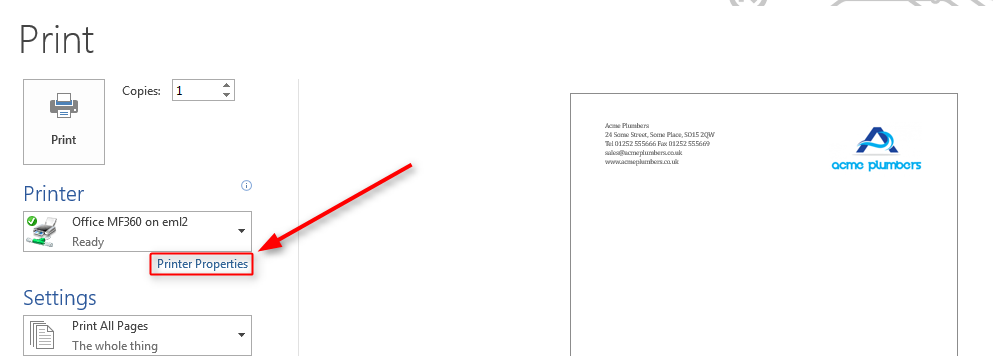
Next with that file open you need to bring up the print dialogue for the Olivetti MFD, you can do this by selecting print and then selecting properties. Be careful not to press Quick Print as this will not work.
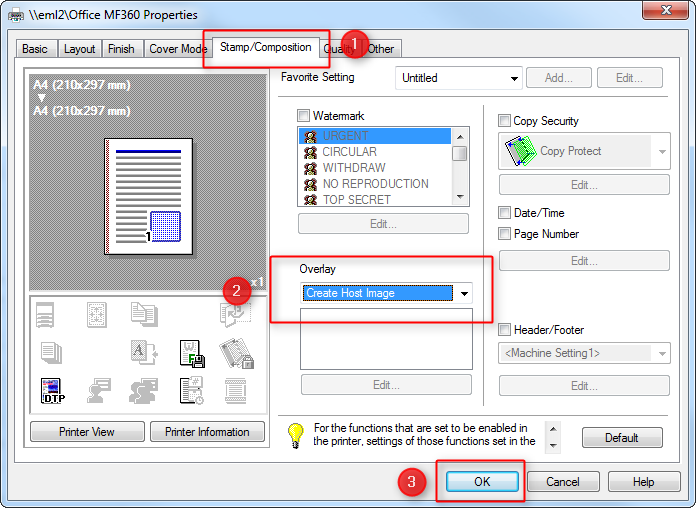
Once the printer properties has been opened go to the stamp/composition tab and select create host image, then OK.
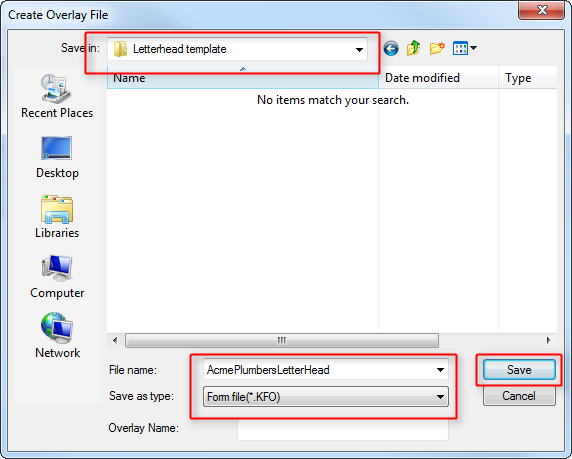
Then print the document as you would normally, this will then ask you where you want to save the file. You can save this locally or in a network location, I would recommend saving it in a network location if you want this available for several users on different computers.
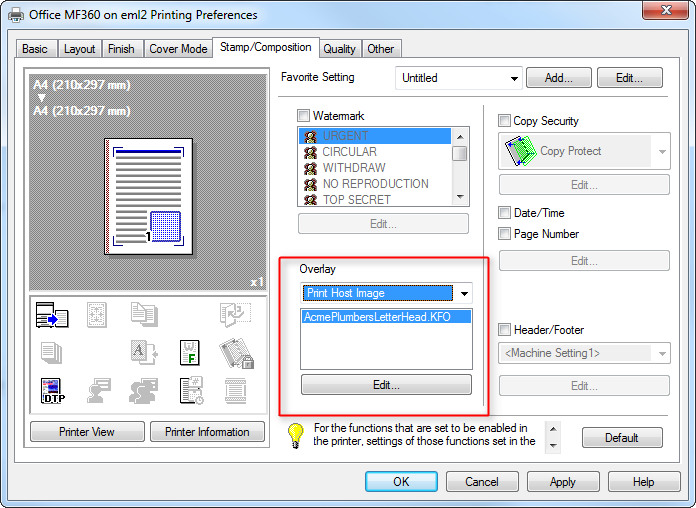
If you are saving this locally on the machine you have created the host image on then the driver automatically remembers where the image is. You can test this by opening a letter and then going in to the printer properties and under the stamp/composition tab selecting print host image, the KFO file should show up like below.
Defaulting The Print Driver To Use a Host Image From a Network Location
First locate the print driver under devices & printers on your computer, then right click and select printer properties.
Go to stamp/composition like before and select print host image, click on edit
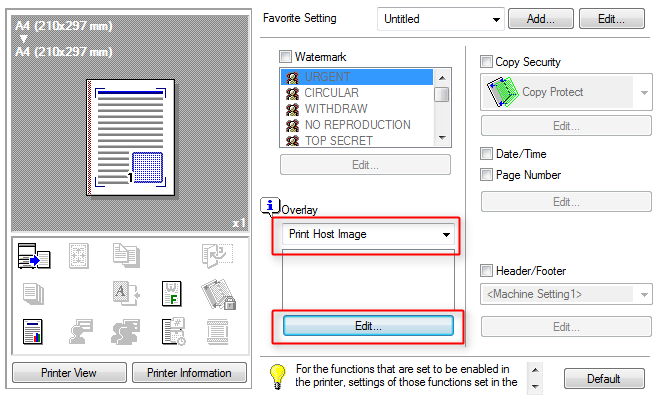
Next click Browse files….
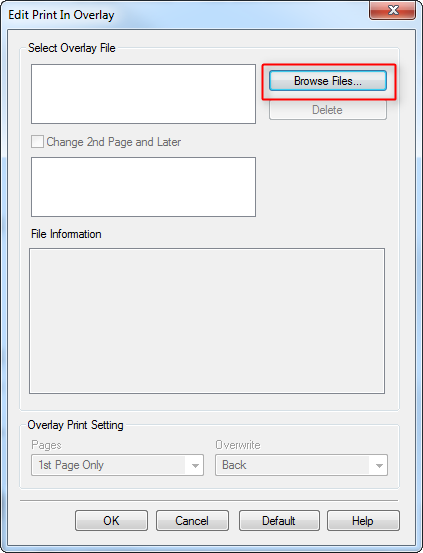
Then enter the UNC path (e.g. \\yourservername\folder\letterhead.KFO) to the file or use the browse function to locate the file and click open.
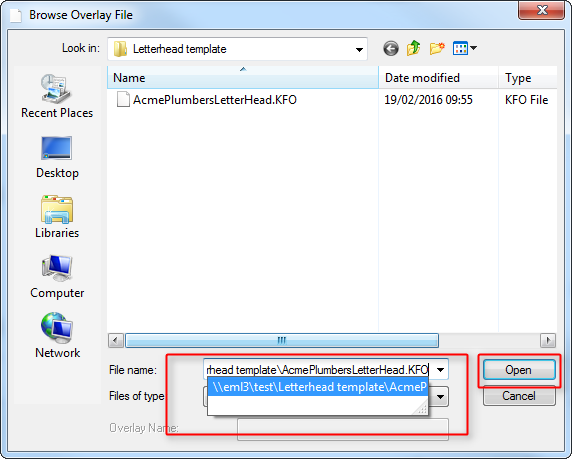
This should look something like below, you can also set if you want the letterhead to print on the 1st page or all pages. Most users just need it on the first page, especially if they are printing 2 Sided and want the second page on the reverse.
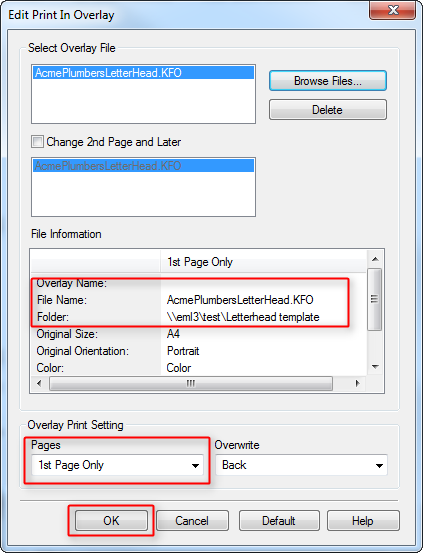
This will now use the letterhead image from the network location, I would recommend using this option if you need this on a number of computers. Especially if you need to update the file as it will automatically update on all the computers.
You may also want to have a designated print driver that is defaulted to print the letter head.
If you need any more info or help with setting this up then contact Elmdale Maintenance Ltd on 0118 982 1444